How Much I Used to Dislike LLM Frameworks, Now LangGraph is Just So Good
When talking about LLM frameworks, were you like me—thinking that things like LangChain were a bit "overkill"? Always felt like writing a few lines of Python code could handle everything.
That's what I used to think, until I encountered LangGraph... Wow, it's amazing! The smoothness with which it solves tool calling problems made even a "hand-rolling purist" like me exclaim "bravo!" Today, let me take you through this experience, and share the pitfalls I encountered along the way.
The official tutorial is divided into 6 steps. Today we'll tackle the first three steps. Mastering these three will solve 80% of Agent development problems.
- Build a basic chatbot
- Add tools
- Add memory
- (Advanced) Add human-in-the-loop controls
- (Advanced) Customize state
- (Advanced) Time travel
Let's get started!
Langgraph Basic Concepts
If LangChain is a development "kit" for LLMs, then LangGraph can be seen as a "blueprint" specifically for building Agents. It operates at a higher level of abstraction than LangChain.
Let's first look at how LangGraph understands Agents. Here's the official definition:
An Agent consists of three components: a Large Language Model (LLM), a set of tools, and a prompt that provides instructions. The LLM runs in a loop. In each iteration, it selects a tool to call, provides input, receives the result (observation), and uses that observation to inform the next action. The loop continues until a stop condition is met—usually when the Agent has collected enough information to respond to the user.
Langgraph is essentially a Directed Graph that can contain multiple nodes. Each node represents a function, and nodes are connected by directed edges that represent transitions between functions.
- State: A shared data structure that stores the current state of the entire graph, such as conversation history, tool call results, etc. All nodes can read and update it. Generally, LLM context is stored in State.
- Node: A node represents a function with processing logic. It receives the current state as input, executes, and returns the updated state. Nodes can define various logic, such as executing LLM inference, calling tools, etc. It receives the current
Stateas input and returns the updatedState. - Edge: Nodes are connected by directed edges, which represent state transitions.
After defining the directed graph in Langgraph, the Agent development is complete. It also supports drawing directed graph visualizations, making it easy for us to quickly understand the Agent's structure.
Now let's use these three elements to begin our first step of learning.
Step 1: Build a Basic Chatbot
Let's start with the simplest chatbot. The core of LangGraph is state management, so we first need to define the state structure and node functions.
from langgraph.graph import StateGraph, START, END
from typing_extensions import TypedDict
from typing import Annotated, Callable, Any, Dict
from langgraph.graph.message import add_messages
from langchain_openai import ChatOpenAI

from config import AgentConfig

main_agent_config = AgentConfig(
    model_name="Doubao-1.5-lite-32k",
    temperature=0.1,
    max_tokens=4000,
)

class State(TypedDict):
    messages: Annotated[list, add_messages]

if __name__ == "__main__":
    graph = StateGraph(State)

    llm = ChatOpenAI(
        model=main_agent_config.model_name,
        temperature=main_agent_config.temperature,
        max_tokens=main_agent_config.max_tokens,
        openai_api_key=main_agent_config.openai_api_key,
        openai_api_base=main_agent_config.openai_base_url,
    )

    def chat_node(state: State):
        result = llm.invoke(state["messages"])
        return {"messages": [result]}

    graph.add_node("chat", chat_node)

    graph.add_edge(START, "chat")
    graph.add_edge("chat", END)

    app = graph.compile()
    result = app.invoke({"messages": [{"role": "user", "content": "Hello friend"}]})
    print(result.get("messages", [])[-1].content)
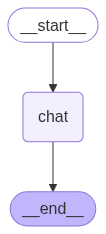
See, we defined a chat node, then connected the two special nodes START (the beginning) and END (the end) to it, completing the graph construction. Every LangGraph has START and END nodes as the Agent's entry and exit points.
This simple example demonstrates LangGraph's basic structure: state definition, node functions, graph construction, and compilation.
You can also execute app.get_graph() to get the graph structure, which is very helpful for debugging complex workflows.
# Generate a visualization of the graph
graph_image = app.get_graph().draw_mermaid_png(output_file_path="agent_graph.png")
Agent Basic Flowchart
Step 2: Add Tools
Now let's add tool calling capability, which is the core functionality of an Agent.
Unlike the handwritten ReAct framework, using LangGraph to call tools is very simple. We just need to define a node specifically for handling tool calls and set up conditional routing (Conditional Edges).
    tools = [Tools.google_search, Tools.code_check]
    llm_with_tools = llm.bind_tools(tools)

    def chat_node(state: State):
        result = llm_with_tools.invoke(state["messages"])
        return {"messages": [result]}

    graph.add_node("chat", chat_node)
    graph.add_node("tools", ToolNode(tools))

    graph.add_edge(START, "chat")
    graph.add_conditional_edges(
        "chat",
        tools_condition,  # Routes to "tools" or "__end__"
        {"tools": "tools", "__end__": "__end__"}
    )
    graph.add_edge("tools", "chat")
    graph.add_edge("chat", END)

    app = graph.compile()
    result = app.invoke({"messages": [{"role": "user", "content": "Hello friend"}]})
    print(result.get("messages", [])[-1].content)
We added a tools node and used add_conditional_edges to define a condition: when the message output by the chat node contains a tool call request, the flow goes to the tools node; otherwise, it goes to END. After the tool execution is complete, it flows back to the chat node, forming a loop.
Let's look at the current graph structure:
Agent and Tool Node Flowchart

Step 3: Add Memory
Only an Agent that can remember conversation history is considered qualified. LangGraph's memory model provides two types: short-term memory and long-term memory.
Short-term Memory
Short-term memory mainly stores the context of the current conversation, including user questions and Agent responses.
The main challenge with short-term memory is that long conversations are difficult to store. Managing long context remains a research question worth exploring.
In LangGraph, short-term memory is implemented based on Checkpointer. Let's look at the specific implementation.
Finally, add memory functionality to allow the Agent to remember conversation history. First, create a memory store. The tutorial uses InMemorySaver, but let's try SqliteSaver.
import sqlite3
from langgraph.checkpoint.sqlite import SqliteSaver

conn = sqlite3.connect("checkpoints.sqlite", check_same_thread=False)
memory = SqliteSaver(conn)

app = graph.compile(checkpointer=memory)
Additionally, during inference, you need to add the following config, using thread_id to represent the uniqueness of the conversation.
config = {"configurable": {"thread_id": "1"}}

result = app.invoke(
    input = {"messages": [{"role": "user", "content": "Hello friend"}]},
    config = config
)
Let's try how well the memory functionality works:
user: I am Code Milestone, did you remember?
assistant: The user identified themselves as Code Milestone, hoping to call a tool with memory functionality to remember the user's identity, but there's no such tool in the current tool list, so I'll answer directly. Got it, you're Code Milestone. Do you have any code-related questions you need help with? For example, would you like to call the `code_check` tool to check a piece of code? You can tell me the code's language type and specific content.

user: Do you know who I am?
assistant: You're Code Milestone. If you have code-related needs, such as wanting to check whether code in a certain language has issues, I can help you call the `code_check` function. You just need to tell me the code's language type and specific code content.
Success! The Agent can now remember our identity. LangGraph's memory mechanism automatically manages the storage and retrieval of session state through thread_id, which is very convenient.
Long-term Memory
Long-term memory in LangGraph allows the system to retain information across different conversations or sessions. Unlike short-term memory, long-term memory is stored in custom "namespaces."
Long-term memory in Langgraph is mainly implemented using store. A typical example is InMemoryStore.
Long-term memory is primarily implemented by the business itself. The official documentation provides a conceptual framework. The following types of content can be saved through long-term memory:
Semantic Memory: Remember facts or concepts for personalization.
Episodic Memory: Remember the steps to complete a task.
Procedural Memory: Remember the rules used to execute tasks.
The official recommends saving these three types of memory through long-term memory. Let's also take a practical look at how to implement this through long-term memory.
Long-term memory storage is similar to dictionary storage. We need to define namespace, key, and value.
When reading, we use namespace and key to precisely retrieve value. Or through semantic retrieval, using namespace and query to retrieve value.
Here's an example using long-term memory:
embeddings = AIHubMixEmbedding()
store = InMemoryStore(index={"embed": embeddings, "dims": 1536})

namespace = ("users", "memories")
store.put(
    namespace,
    "user_123",
    {
        "name": "John Smith",
        "language": "English",
        "food_preference" : "I like pizza",
    }
)
store.put(
    namespace,
    "user_124",
    {
        "food_preference" : "I like apple",
    }
)

def get_rules(query: str)-> str:
    """
    Get user rules for answering user questions
    """
    from langgraph.config import get_store
    return get_store().search(namespace, query=query, limit=1)

tools = [get_rules]
llm_with_tools = llm.bind_tools(tools)

app = graph.compile(store=store)
result = app.invoke(
    input = {"messages": [{"role": "user", "content": "do you know my name?"}]},
    config = config
)
print(result.get("messages", [])[-1].content)
The store passed in during graph compilation is the long-term memory storage. You can get the store through get_store() anywhere, then perform save and retrieval operations.
Honestly, I feel this built-in long-term memory feature is somewhat "redundant." It essentially provides basic RAG capabilities (storage, semantic retrieval), but the functionality is quite basic. If your project already has a more powerful external RAG system, I recommend calling your own RAG service directly in the tool function (like get_rules).
By the way, there's another frustrating thing—AIHubMixEmbedding is my own implementation. Langchain only has OpenAI's official embedder. If you're not using the official interface, you need to implement it yourself.
Summary
So, where exactly does LangGraph "shine"? Let me summarize a few points I can't put down:
- Flexible Workflow Control: Supports conditional branching, loops, and other complex workflow controls
- Simple Tool Integration: Tool calling logic is more reliable, reducing the workload of prompt engineering
- Powerful Memory Features: Built-in short-term and long-term memory for easy conversation state management
Through these three steps, you've mastered the core usage of LangGraph. Next, you can explore more advanced features like human-in-the-loop controls, custom state management, and time travel.
LangGraph is indeed a powerful Agent development framework. It makes complex multi-step reasoning more controllable and reliable. For scenarios that require calling multiple tools and maintaining conversation state, LangGraph is absolutely a Swiss Army knife for building complex Agents. Hope this introduction helps open the door to a new world for you!
All code in this article has been open-sourced in my TinyCodeBase repository: TinyCodeBase. Welcome to star for continuous updates. Every piece of feedback is my greatest motivation for continuous creation!